10.11.2022 - 11.12.2022 (Week 11 - Week 15)
Chung Yi Ki / 0345014 /
BDCM
Animation Fundamentals
Project 3: Emotion Animation / Final
Project Teaser Animation with Film Studies and Cinematography module
Lecture
Week 11 / Facial expression animation
When animating facial expressions, squash and stretch can be applied in the
breakdown drawings. Make use of arc as well in any turning motions. When
changing between expressions, the eyes should be squinted as a breakdown
drawing.
Instructions
This project is a continuation from project 2 and the continuation of the
joint final project with Film Studies and Cinematography module. We were
tasked to continue on finishing the animation for all the scenes selected for
our Film Studies and Cinematography final project, and add facial expressions
animation in our scenes where necessary.
Visual references
Fig 1.1 Self-recorded angry, scared and passing out reference
Continuing from project 2, I have the proceeding 2 scenes (scene 3 and 4) from my animatic that I have not yet animated. So, since those scenes are heavy on facial expressions, I took a video of myself acting out parts of the scene as reference, the first one being looking more and more terrified as someone comes in, the second is getting angrier and angrier when punching, and the third one is slowly passing out while trying to keep awake.

|
|
Fig 1.2 Scared expression reference Source: https://www.animationmentor.com/blog/the-6-basic-emotions-animating-fear-with-keith-sintay/ |

|
|
Fig 1.3 Scared expression reference Source: https://bardotbrush.com/how-to-draw-a-scared-expression/ |

|
|
Fig 1.4 Angry expression reference Source: https://www.pinterest.com/pin/1196337395787746/ |
I also searched online for some additional image references for scared and
angry expressions.
Animation process
Fig 2.1 Revised animatic (changes to scene 3 and 4)
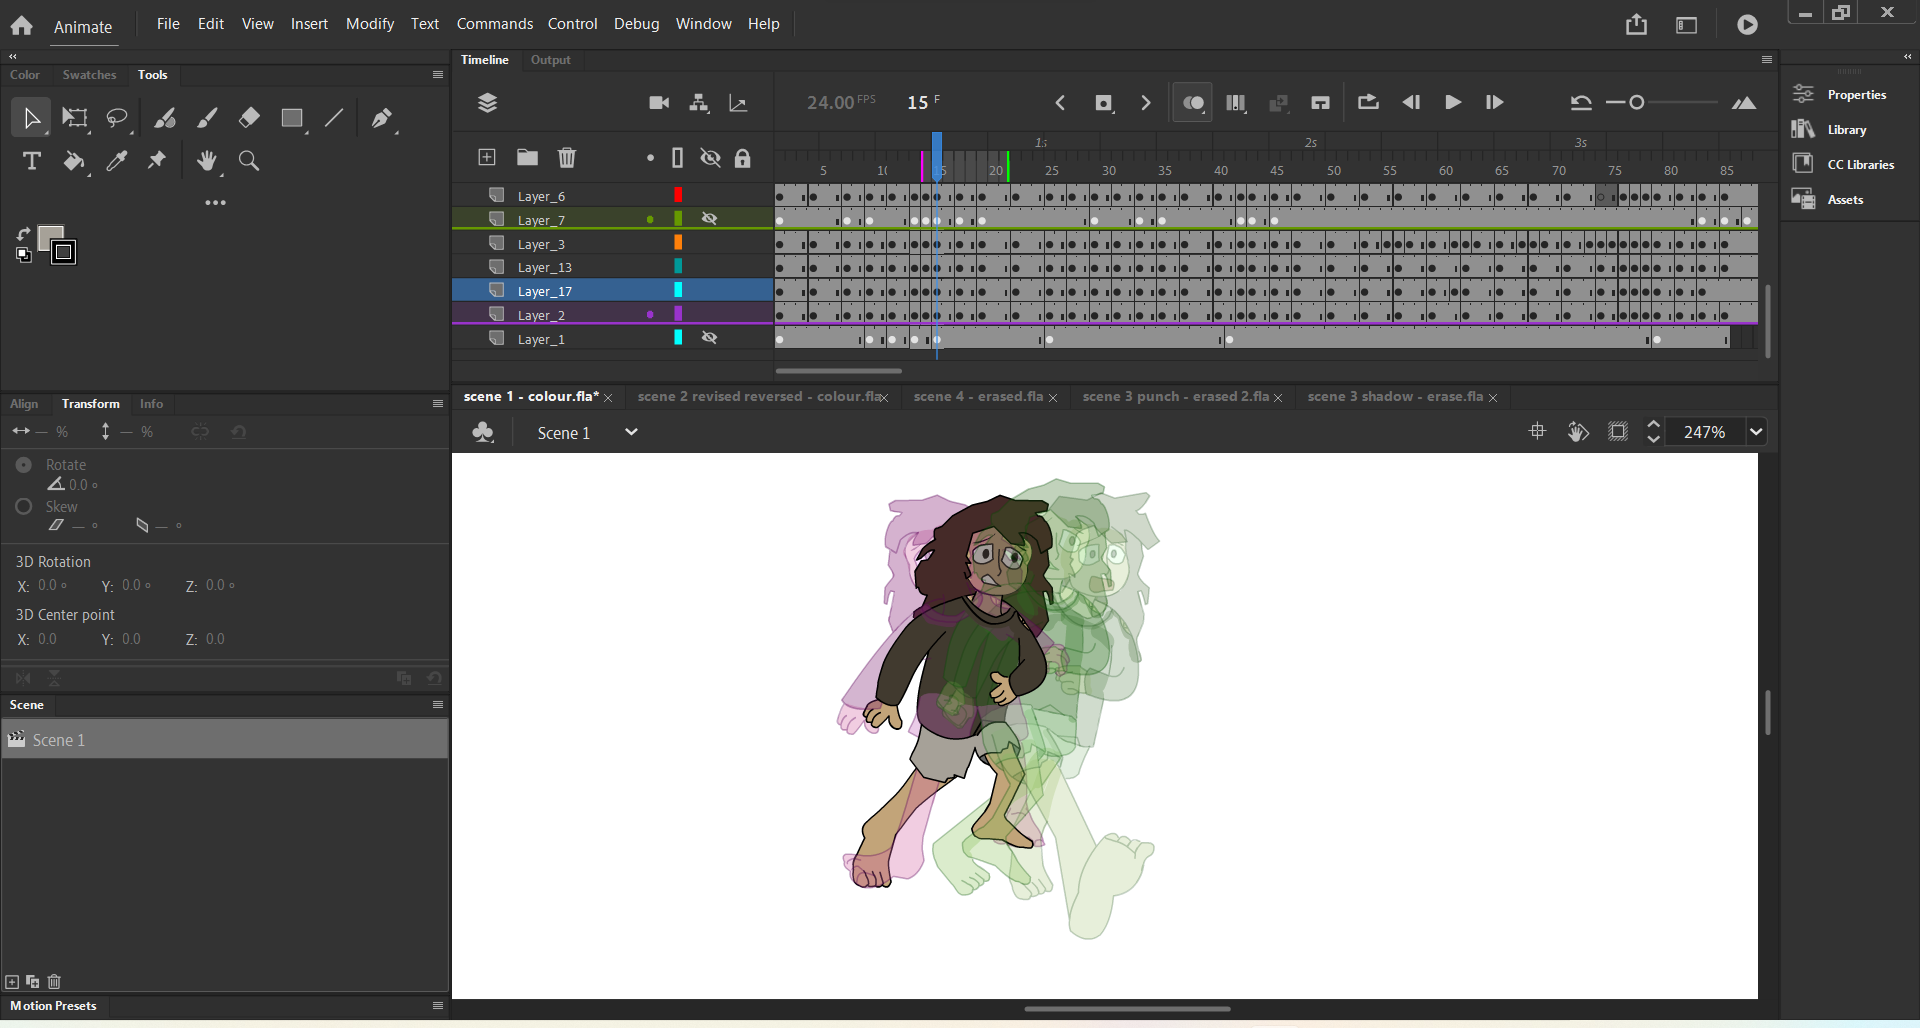
Fig 2.2 Onion skins and smear frames in certain part of scene 3 and 4
animation
Fig 2.3 First progression of first part of scene 3
(shadow coming in and girl getting more and more terrified)
Fig 2.4 First progression of second part of scene 3
(vendor picking the girl up and punching her)
Fig 2.5 First progression of scene 4
(girl passing out and points a gun at the vendor)
I started my animating progress by using my animatic as a rough animation and
then further edit and clean the animation by creating tie down drawing in
Adobe Animate using the pen and line tool. I changed the first part of scene 3
from my animatic to show that the shadow is coming from the front instead of
the side as I found out that it wouldn't make sense for the main harsh shadow
to change direction if it's created from a singular light source, and even
when there's a second light source there would need to be 2 visible harsh
shadows. So, I made the changes to make it more simple but still give a clear
message, the girl's head direction changes to looking at the front instead to
the side as well.
Other than that, I also made use of smear frames in certain inbetween drawings
to give the movement a sense of speed. The scenes are animated in a
combination of 2's and 3's according to the speed of the movements. Some
inbetweens are animated on 1's and some frames are hold to last a few more
frames for favoring and to give a more "weighty" feel like the foot stomping
scene in the starting of Fig 2.4.
Fig 3.1 Draft composition of all scene using current progress

|
| Fig 3.2 Using favoring and inbetween on 2's for camera movement in scene 2 |

|
| Fig 3.3 Onion skin of punch, with anticipation, favor and hold |
|
| Fig 3.4 Added inbetween frames for changing direction in scene 1 |

|
|
Fig 3.5 Adjusting the hair movement to raise up in scene 1 |

|
| Fig 3.6 Lighting compositing for first part of scene 3 |

|
| Fig 3.7 Glass shattering effect for second part of scene 3 |

|
| Fig 3.8 Animating the camera movement for scene 1 |
After that, I erased the overlapping and excess lines in the animations and
coloured some of them. I also composited the first part of scene 3 with
background and lighting in After Effects and the glass shatter transition for
the second part of scene 3 in After Effects to test out the effect. I followed
this tutorial
in using masking to light the character in After Effects and
this tutorial and
this tutorial
in creating the glass shatter transition. Aside from using masking for the
lighting, I also used a spotlight as a base light for the character, and
colour corrected her to match the colour of the background. The camera
movement for scene 1 was also done in After Effects by animating the position
and scale of the layers in a 3D space.
Further refinement of animation

|
| Fig 4.1 Adjusting the hair movement to raise up in scene 4 |

|
| Fig 4.2 Adjusting the spacing for the camera movement change in second part of scene 3 |

|
| Fig 4.3 Changing the right leg bending direction in scene 1 |

|
| Fig 4.4 Animating the drop of blood in scene 4 |
After receiving feedbacks from Mr. Kamal, I continued with colouring and
refining the animation for the scenes. I corrected the hair movement in scene
4 as well like how I did for scene 1 in Fig 3.5. I also adjusted the spacing
for the camera movement in the second part of scene 3 to make it more snappy
and less jerky. In scene 1, I also changed the right leg bending direction
from side to more frontal in one of the frames. For scene 4, since there's
blood on the character, I decided to animate a drip of blood from the
character's mouth to give it more life. I also looked through all the scenes
and made sure the lines are smooth and not jagged/blocky (except for the
girl's hair as it is part of her design), and made changes according to the feedbacks I received. Then, I put the animation with the background in After Effects and composited them with lighting using masking and colour corrections.
 |
| Fig 4.5 Adding rain to scene 1 |
I also added raining animation in scene 1 and 2 using After Effects by following this tutorial to match with my animatic. After compositing everything, I brought all the scenes to Premiere Pro to edit and add sound effects. Further details on editing and compositing can be read in Film Studies and Cinematography project blog post.
Final teaser animation
Fig 5.1 Final teaser animation
Feedbacks
Week 13
For the punching scene, can try favoring to create a snappy motion, where two close spacing drawings for anticipation and then smear and then punch. One close spacing drawing to favor for anticipating the punch, and then another close spacing drawing to favor for landing the punch. Overall, the animation for the scenes look a bit jerky, play with spacing.
Week 14
Make sure that the lines are clean and smooth. Give a darker colour to the triangle part of the girl's shirt, like her shorts. The right knee should be more bent in the inbetween falling down scene 1. Colour wise looks good and the second scene is better. Put darker colour for the vendor in scene 1. Increase the brightness of the lighting in the first part of scene 3. The pink sketchy drawings in scene 3 can remain as is since it's significant to the story.
Reflection
This project was really, really time consuming, but that is just the nature of animation, and also me wanting to try out in creating something that's currently out of my skill level has a part to play in this as well. But, truth be told, I still enjoyed making this animation even with all the frustrations and countless midnight oils I've burned. I really learnt a lot in the process of making this, especially with spacings and timings, and how to use favoring and smear frames. Although there are still some thing that I wished I could've changed and do better, but time is packed and I had to shift my focus in completing the bigger picture of this project. All in all, I'm really glad that I managed to get this done. Though I still favour keyframes animation (like in After Effects) over traditional frame-to-frame, but it is a great learning experience and would definitely help me in my future projects.
Comments
Post a Comment