This week, we are given an introduction on the module and the exercises and
projects that we’ll be doing throughout the semester. We are also given an
introduction explanation of the process of creating a time base
project.
Pre-production
Pre-production stage includes idea development, creating the story and
determining location and props, storyboarding as well as finding visual
references. We should start with understanding the idea of the project and
think about what is needed to create it.
The three most important stage in video making is idea development, story
and storyboard. Visual references are then needed to help guide and explain
the art direction of the video.
Production
This stage is where the video shooting begins. Lighting, props and costumes
are prepared, and scenes are shot according to the story.
Post-production
Post-production includes editing the videos and images from the production
stage in order to create a good timing between scenes and make the story
coherent. Audio editing is part of this stage too.
After the introduction, we edited a video along with Mr. Martin in our
tutorial class, where we needed to stitch separated parts of a video so
they’d connect as one video. The
video files
are given to us in this tutorial activity.
Invented by Disney during the 1930's. storyboard functions by converting
script to a visual depiction. In filming, it helps to plan out the filming
framing. Storyboard provides a layout of the scenes and events as if they're
seen on camera. Use different framings and different angles shot to create a
more interesting viewing and storytelling experience.
Fig 2.2 Cutaways in storyboard Source: Lecture slides
Fig 2.3 Example of a scene with cutaway and close up
Cutaways can enhance the visual storytelling of a film by making it more
interesting to watch and also create the mood of the scene. They can be used in
a way as a transition to a new scene.
Animatic
Fig 2.4 Example of an animatic and final film comparison
An animatic is a series of images played in a sequence, often with a
soundtrack. In other words, it is an animated storyboard. Advantages of
creating an animatic is that it's able to plan the timing, rhythm of the
scenes and shots as well as plan which audio and music to add.
In this week, we are tasked with watching any stop motion and visual effects
shorts on Youtube or Vimeo and choose 3 out of each of them in which we then
explain why we made the choices on our blogs.
Short motion shorts
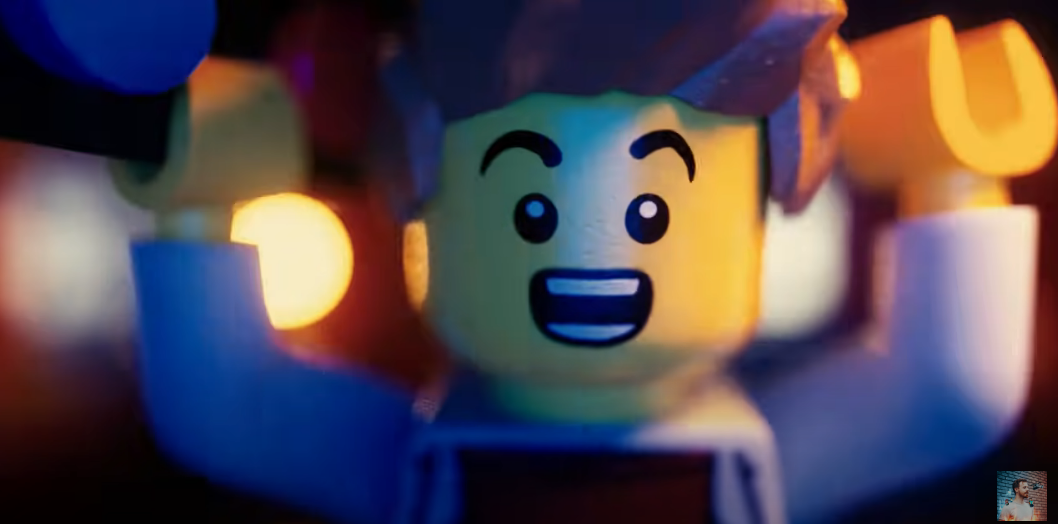
Fig 1.1 Stop motion shorts #1
This stop-motion short chooses a silent film approach where there’s no
dialogue involved, and instead tells the story solely through actions. It
uses felt and wool as its art direction where you can all strands of stray
wool clearly from the characters and also from the fire. The animation is
seamless, where little details such as the dog’s eye moving up can be seen
to show emotion. The cinematography is captivating in every scene, where the
framing helps to guide the flow of the story and also deliver emotional
impact through close-ups. The character design is simple and cute, which
fits the style of the video. The sound design fits perfectly too. The
lighting and colour grading changes according to mood which helps to drive
to story forward.
Fig 1.2 Stop motion shorts #2
Although the animation isn’t as smooth as the one mentioned before, but the
way the story is told is effective, making the style of animation relevant to
the direction of the story. It’s also interesting how the characters are a
real-life light bulb and how the set design is very simple, with just a few
painted blocks and printed out pictures for scenery. The “down-to-earth”
overall art direction of the short makes it very grounded and give a bit of
child-like wonder to it. As like the previous video, it’s a short with no
dialogue, but its timing and sound effects makes the video captivating to
watch.
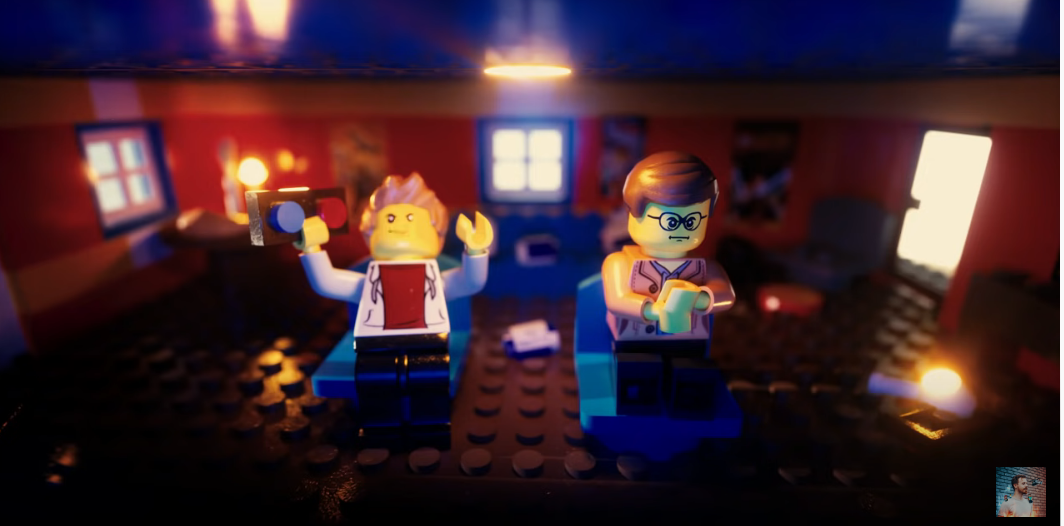
Fig 1.3 Stop motion shorts #3
A stop-motion short using Legos for their art direction and for this video,
it included dialogues for the story. One thing that makes this animation
apart from other Lego animation is that this takes a more cinematic approach
to its story telling. The framing of every scene is well thought out and
conveys the emotion of that particular scene, and the slightly washed out
vintage colour grading used throughout the video gives a 90’s outlaw feeling
to it, which suits the story. The video has a darker colour palette too
which supports the serious tone of the story. While the character’s mouth or
facial expression doesn’t change throughout the video, the body animation
itself is enough to drive the dialogue forward. The lighting also helps to
make the video look more dramatic, and the music and sound effects used make
it feel even more cinematic.
Visual effects shorts
Fig 2.1 Visual effects shorts #1
The video takes on a Hollywood approach to the colours and lighting, where
everything is crisp, sharp and saturated, which puts the viewer’s guard down
as it looks normal. Later on, audience are surprised with seamless visual
effects illusions done throughout the video. The visual effects are very
believable and viewers won’t know what is happening until the action
happened, which makes it feel very much like a magic show. The frequent
camera panning also helps guide the viewer’s eye of the actors’ movement and
make things less stiff.
Fig 2.2 Visual effects shorts #2
As like the previous video, it starts with an unsuspecting premise and then
surprises the audience with a visual effect trick. The perspective change is
seamless and although it feels surreal, it also looks realistic at the same
time. The lighting of the couch when being picked up stays consistent and its
motion of getting put into a plastic bag is also edited smoothly, as well as
the shadow of the coach when it’s being picked up, which sells the illusion
even more.
Fig 2.3 Visual effects shorts #3
This style of visual effects focuses more on making seamless transitions than
the other two, which focuses on playing around with objects. The
seamless transition in this video has a mind-boggling effect to the viewers,
making them think they’re watching a realistic magical world. Especially for
the mirror transitions, the lighting was kept constant when he approached near
the mirror, in order to make sure no kind of shadows or reflections can be
seen on the mirror.
Week 6 (6/5/2022) - Final project video development (story outline and choice of
direction)
For this week, we are tasked to decide on the theme of our final project
and the type of stop motion or visual effects video we want to do. We also
need to write one paragraph of our story outline and find 3 references for
our final project video.
After watching multiple stop motion and visual effects video, I decided to
do a LEGO stop motion for my final project. The theme I choose is social
issues and the topic is “Don’t drink and drive”. I had a don’t drink and
drive PSA idea some time ago and thought I use this opportunity to build
on it.
Story outline
A person is driving on the road at night while listening to loud
music. He’s enjoying his drive down the road to meet his friend while
drinking a can of beer. Although his friend warned him about it, he
insisted that it’s fine since it’s just one, measly can of beer. The
road seems to be not busy, so one can assume that nothing bad will
happen, right? The person starts to feel his eyes weighing down,
double vision occurring in everything he sees. He doesn’t know how
slow or how fast he’s driving, but he tries to focus and stay awake
anyway. Soon, his vison gave way, and down his head drop to the
steering wheel as a bright beam of headlight is shining closer and
closer towards him.
3 references for the video
Fig 3.1 Reference video #1
Fig 3.2 Reference shot #1
Fig 3.3 Reference shot #3
Fig 3.4 Reference shot #4
I focus on searching for Lego stop motion videos to have a better
visualization on what I want to include in my video. I choose the video as
my reference mainly because of the lighting of the fist scene and the shot
framings throughout the video. The shots in the video are framed to feel
cinematic, with various close up shots, medium shots and wide shots, and
blurred backgrounds. It feels as if the viewers are watching a movie
rather than the usual stop motion Lego animation, so I want to try and do
that for my video. The facial expression animation in this video is also a
good reference too if I ever plan to do something similar in my
video.
Fig 3.5 Reference video #2
Fig 3.6 Reference shot #1
Fig 3.7 Reference shot #2
Fig 3.8 Reference shot #3
This video is chosen as my reference as it has a lot of moving car
animation and also shots of Lego minifigures in car interiors. The car
movements are smooth and the car interior shots doesn’t feel miniscule
either, despite the props being small scale in real life. It would be a
good reference for me on how to plan my props and shots in my video.
Fig 3.9 Reference #3
Fig 3.10 Reference shot #1
Fig 3.11 Reference shot #2
Fig 3.12 Reference shot #3
Fig 3.13 Reference shot #4
Although this is a live action video, the double vision shots (Fig 3.10
and Fig 3.11) inspired me in my story planning so I plan to reference that
in my video. The shots in the car interior can also be referenced and I
could try to recreate them using small scale Lego props.
Fig 3.14 Test shots to see if using Lego set would be workable
After writing my story outline and choosing my reference videos, I built
some simple Lego props and set using Lego pieces and took some test shots to
see if the idea would be workable for my final video.
Week 10 (3/6/2022) - Storyboard
We are tasked with creating our final project storyboard based on our
story outline this week. I decided to create an animatic for my storyboard
so that it would help me plan the running time of my video better, and
also because I wanted to try out an audio test with it.
Fig 4.1 Storyboard animatic - Draft 1
Fig 4.2 Recording showing the Lego minifigure head that will be used in the
video
The animatic sticks closely to the story outline, though some minor things
are changed. Instead of a can of beer, I decided to use a bottle of beer
since there’s a Lego bottle piece where it’s designed specifically for a
Lego minifigure to hold, so it would be easier to set up the scene later.
For the part before the double vision scene, I decided to show the driver
changing his expression by turning his head all the way around since I’ll
be using a Lego minifigure where the back and front of the head has two
different expressions. The ski cap the Lego minifigure will be wearing is
to cover up the martial arts band on the head of the minifigure, so that
the driver would look more casual and older.
Fig 4.3 An Ambulance by Mike Krol
The song “An Ambulance” by Mike Krol is chosen to use in the video because
the song itself is rock and loud, which is what I thought of when writing
the story outline, and the lyrics are fitting for the video.
Fig 4.4 Reworked storyboard animatic
After receiving feedback from Mr. Martin, I decided to further change the
story flow in the animatic to make the video more interesting to watch. I
added a scene showing the driver drunkenly walk to his car and drives away
at the starting part of the video. The proceeding interior car scene is kept
the same from the first animatic. After the car interior scene, a scene
showing the driver recklessly driving down the road is added to give context
of the severity of the situation. Next, new scenes are added where it shows
a kid trying to cross a road on his skateboard but is unexpectedly crashed
by the driver, causing a bloody and terrible accident.
Fig 4.4 Reworked storyboard shot notes and test shots
I also wrote down the breakdown for each shots from the storyboard and took
some lighting test shots so that my idea is more clearly shown. In the test
shots, either ring light or flashlight is used for the white light and
either wired yellow LED diodes or hand held yellow LED diode are used for
the yellow-orange light. The yellow-orange light is to simulate the light of
a street light.
Week 11 (10/6/2022) - Test shot and stop motion group shooting
Fig 5.1 Reckless driving scene test shot
Fig 5.2 Shots taken for the test shot
Early in this week, I decided to create a test sequence of the reckless
driving scene. I used a flashlight for the main light and hand held the
yellow LED diode as I find that it’s more flexible to work with than a wired
LED circuit. I shot it with using my phone’s camera on auto mode and edit it
Adobe Premiere Pro. The skidding smoke of the car was made using cotton. A
total of 29 pictures were taken.
For class this week, we had a studio practice where we tested out shooting
a scene from one of our classmate’s stop motion storyboard. I was in a
group together with Alicia, Sasilvia, Adlina, Adriel and Adriel’s friend.
We took a scene from Alicia’s storyboard to shoot and used her clay
character, camera and camera tripod that she brought to class.
Roles:
1. Alicia – Director
2. Yi Ki – Director of Photography
3. Adlina – Assistant director of Photography
4. Sasilvia - Art and costume director
5. Adriel – Lighting crew
6. Adriel’s friend – Lighting crew
I am sorry that I didn't get to know the name of Adriel's friend :(
Fig 5.3 Shots taken
The scene was the bunny falling down in a dark void. Mr martin
provided us with a skewer to hold the bunny and a yellow studio light for
the light source. The pictures were taken in low ISO and high shutter speed
as we took it in a dark environment.
Fig 5.4 Compiling the shots in one sequence on 2 frames per second
Fig 5.5 Made the compiled shots to a nested sequence and
adjusted the brightness and contrast on an adjustment layer
Fig 5.6 Removing the skewer stick using masking tool and keyframing
Fig 5.7 Music used in the edited sequence
Fig 5.8 Edited sequence
After taking the pictures, I edited the shots in class using Adobe Premiere
Pro according to Alicia’s direction in her storyboard. The skewer was
removed using the masking tool in Premiere Pro.
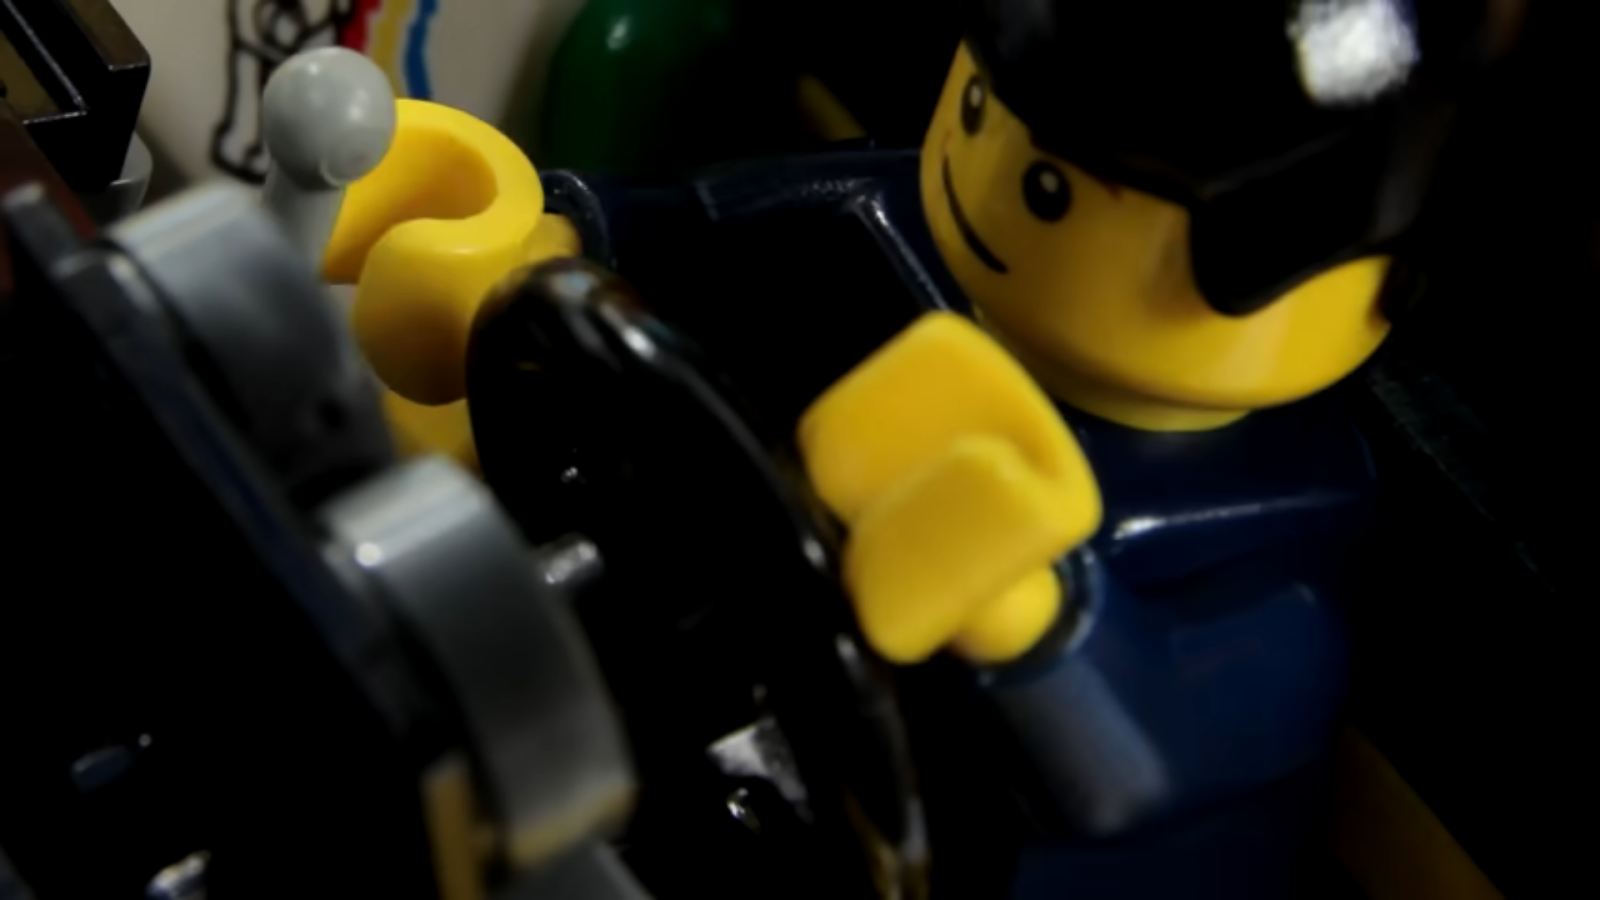
I used Lego bricks to build the set for the car interior set. Since the back
of the car won’t be clear in the final shot, I decided to use Lego bricks to
just resemble the basic shapes of seats and back windows. The car dashboard
set is also built using Lego bricks but with a printed picture for the
dashboard meters.
Fig 6.4 Exterior set - eye level angle WIP #1
Fig 6.5 Exterior set - high angle WIP #2
Fig 6.6 Creating the city silhouette on Adobe Illustrator
As for the exterior set used in the final shoot, a black board was used for
the background together with card cutouts of dark blue city scape
silhouette. (like Fig 6.4) Grey and dark grey papers (like Fig 6.5) were
used for the sidewalk and road. Dark red clay was used to create the curb of
the sidewalk. Straws wrapped with Lego plates as base wrapped in tin foil
were used for the street lights. The city silhouette was created on Adobe
Illustrator and then printed out on card stock paper.
Stop motion shooting
Fig 7.1 Shots taken using Stop Motion Studio
I shot my stop motion on my phone using a stop motion app called “Stop
Motion Studio” as the app has an onion skin function which lets me animate
easier. My camera setting was around 100-400 for ISO and shutter speed is
set at a high number for all scenes. The total number of frames for all the
scenes, including duplicated frames, is 747 frames. Some shots are taken
multiple times to see which would work better when editing.
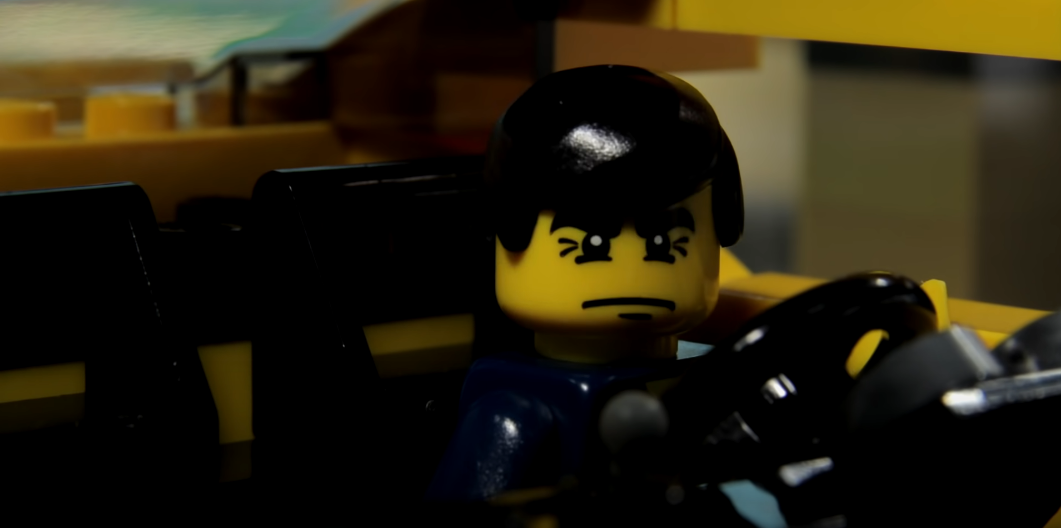
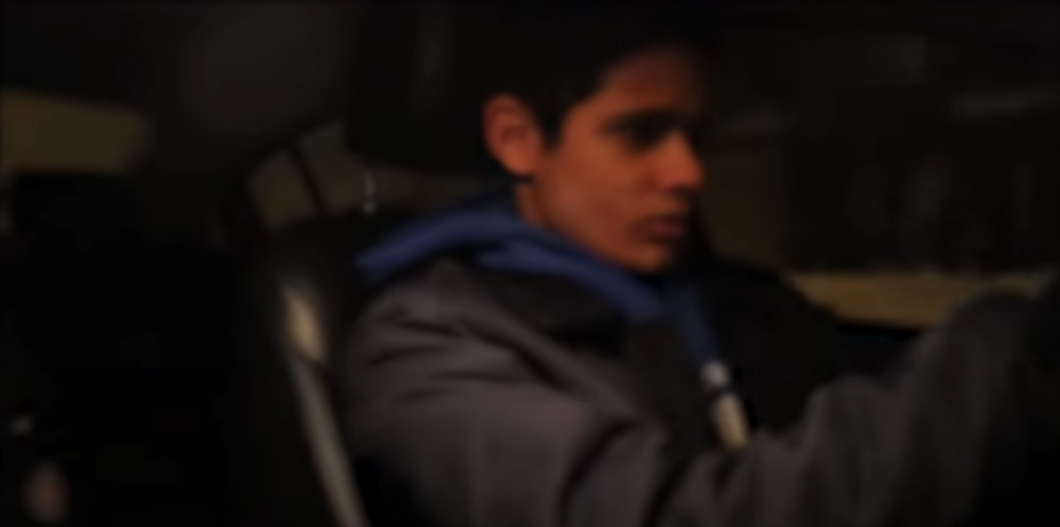
Fig 7.2 A shot of the car interior - driver seat
Fig 7.3 A shot of the car interior - passenger seat next to driver
For the car interior, a ring light and light from my laptop screen were used
as the backlight, a white paper is placed near the set to act as a reflector
and a white LED diode is placed in front of the Lego minifigure to act as
the key light for the subject, and to also simulate the look of a car
interior taken from outside the windshield. I turned on a ceiling light at
the left side of my room to brighten up the scene more.
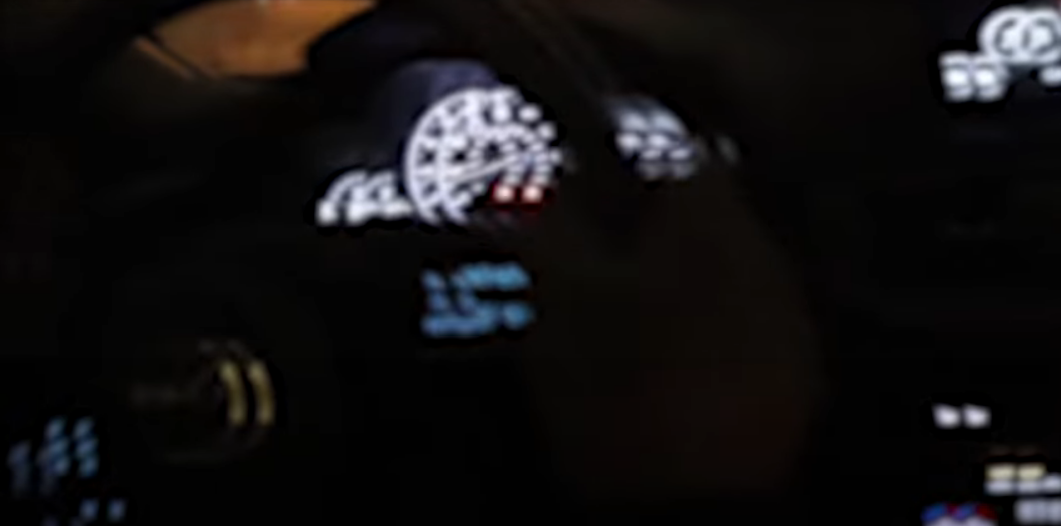
Fig 7.4 A shot of car dashboard with red-orange light
Fig 7.5 A shot of car dashboard with white light
The ring light, and laptop screen light were kept for the car dashboard set
up. A LED diode was placed behind the printed picture to make the shot look
like the dashboard meters are glowing. I tested the shot with both white and
red-orange LED and decided to use the red-orange LED as I think it fits
better and feels more dramatic.
Fig 7.6 A shot of exterior scene - Kid trying to cross the road
Fig 7.7 A shot of exterior scene - Bloody head flying using skewer
stick
For the lighting in the exterior set, a flashlight shining from the
front of the set was used as the main light and a white LED diode was put near
the subjects but out of frame to give some back lighting. The yellow-orange
street light was done by hand holding a yellow LED diode.
Fig 7.8 Last shot with red-orange light
Fig 7.9 Last shot with blue light
For the last shot, it was shot using my phone’s own camera app. Red clay was
used as the blood and the set up is lighted with a flashlight shining at the
side and a red-orange LED diode and blue LED diode were used for the
red-orange and blue light.
Stop motion editing
First cut of stop motion video
Fig 8.1 Original shots of head falling scene in Fig 8.2
Fig 8.2 Masking out the skewer stick frame by frame (pictures
are in 1fps)
Fig 8.3 Original shot of the car interior scene in Fig 8.4
Fig 8.4 Masking out the skewer stick using keyframing
Fig 8.5 Original shot of kid crossing street in Fig 8.6
Fig 8.6 Masking out the skewer stick using keyframing
Fig 8.7 First cut of stop motion video
After I’m finished with shooting all the scenes, I exported the shots as
videos and imported them in Adobe Premiere Pro to compile and edit. For my
first cut, I compiled all the shots and added the music and some sound
effects. I also masked out the sticks using the masking tool.
Fig 8.8 Red clay blood droplets picture
Fig 8.9 Isolated blood droplets with adjusted brightness and
contrast
Fig 8.10 Editing in the isolated blood droplets and resizing them to
fit the scene
For the falling blood in the head flying shot, I took a picture of various
sizes of red clay and edited them in to the frames of the shot in Adobe
Photoshop. The final edited frames are saved as JPEG pictures and added
into the scene in Adobe Premiere Pro (timeline in Fig 8.2).
Second cut of stop motion video
Fig 9.1 Screenshots of colour adjustments settings and sound effects edit
of the scenes
Fig 9.2 Full timeline of second cut
Fig 9.3 Second cut of stop motion video
After receiving feedbacks from Mr. Martin, I continued with editing parts
that felt too fast or too slow and colour corrected and graded the scenes. I
also added in all the necessary sound effects and tweaked some by adjusting
the pitch, bass, parametric equalizer and volume so that they would fit the
scenes more.
Fig 9.4 Brush strokes of clone tool on one of the scene from the
video to remove Tack-It
For the Tack-Its that I used to keep the subjects in position in some of the
shots, I removed them by using the clone tool in Adobe After Effects. I also
removed some shadows that can be seen in the background for a few scenes but
kept the shadows for the reckless driving scene as I thought it looked more
dramatic with it and the shadows kept moving from one end to the other end
so it was hard to remove them seamlessly.
Fig 9.5 Transform and Directional blur settings on adjustment
layer to create crash zoom effect
I also added a crash zoom effect at the start of the reckless driving scene
by adding adjustment layer on top of the clip, and keyframing the position
and scale of that layer. Directional blur is also added to create a motion
blur effect.
Fig 9.6 Camera shake effect settings using Red Giant Universe plugin
I added a camera shake effect for all the interior scenes and the
reckless driving scene too by using a plugin called “Universe" by Red
Giant.
Third cut of stop motion video
Fig 10.1 Full timeline of third cut
After receiving feedbacks from Mr. Martin, I changed the laughing
sound in the first scene to burping, hiccupping and mumbling sounds. I also
increased the volume for the interior car engine sound effect and lowered
the music volume a little so that the engine sound would be more audible and
blends in with the music. The volume of the other sound effects was adjusted
where necessary. A simple credit scene at the end is also added as
well.
Fig 10.2 Bass and pitch shifter adjustment for phone dropping sound
effect
Fig 10.3 Parametric equalizer adjustment for phone dropping sound
effect
I used the same sound effect I used for the skateboard dropping in the kid
crossing the road scene for the phone dropping in the car interior scene. I
edited the sound so that it would fit better for that particular
scene.
Fig 10.4 Transform effect settings on adjustment layer for crash zoom
effect
Fig 10.5 Directional blur effect settings for motion blur when crash
zooming
A crash zoom effect is also added to the close up of the kid’s face scene
to give some dramatic impact.
Final outcome
Fig 11.1 Final stop motion animation video - Drink and drive PSA
Feedbacks
Week 9
The topic and story outline is ok, proceed to storyboarding. You might want
to do the lighting set up in campus, but you can try it at home if you want.
If you're using a ring light and find the lighting is too strong and harsh,
put a tracing paper over it to make it softer.
Week 10
The storyboard animatic doesn't have much impact, use all the possibility of
the video being a stop motion, exaggerate more. Don't just stop at the head
turning all the way around idea. For example, maybe the car is driving in a
"S" shape and crash onto something and flies to the air while turning 360
degree.
Week 11
The reckless driving scene test sequence is nice. The reworked storyboard
animatic works too. Remember to not use auto mode when shooting the final
stop motion animation. Since it's going to be shoot in a low light
condition, use low ISO to prevent too much noise and high shutter speed to
increase the exposure value.
Week 12
Stop motion progress is looking good, continue adding all the sound effects
and do the colour correction. Add a camera shake effect for the interior
shots as well.
Week 13
Maybe add some crash zoom and camera shake for the reckless driving scene. For the Tack-Its that can be seen in the video, better to mask it out in
After Effects since it's a video and not a jpeg sequence originally. The
whole video works, continue to get it done with the colour and audio
Week 14
Make the engine sound of the car in the car interior shots blend in with the
music by increasing the volume. Add a crash zoom effect when the car is
coming closer to the kid scene. Add mumbling or singing and burping sound
instead of laughing in the first scene. Increase the volume of the glass
bottle dropping sound since it's a bit soft. Add a sound effect for the
phone dropping as well.
Reflection
This project was very time-consuming and can be frustrating because of
that. But despite all of that, I did enjoy it and felt really glad to see
the final outcome of my project. Although I enjoy doing animation, stop
motion is a territory that I’ve always been reluctant to try as I know how
painstaking it is to set-up the set, lighting, camera framing and take the
pictures of every small movement one by one. But I’m kind of glad that
this project forces me to do it as I at least got an experience of how is
it like to do it. I also got to learn and practice more about lighting in
this project as I have to use artificial lighting from start to end and
set it up myself.
The most challenging part for me would be the set design and lighting. As
the scenes are set up in a fictional car and road, I had to make sure the
set designs make sense to reflect that and also visually interesting
enough to watch. Building something out of hand is not my strong point so
I took some time to complete that. The same goes to lighting as well. It’s
my first time using lighting to create the look and moods I want in a
physical set, so I did a lot of try-outs on it. Overall, this project was
fun although it has its challenges and frustrations, and I got to use what
I’ve learned in project 2 for shot sizes, and project 1 for audio editing,
all in this project.
Sound effects sources (in order of appearance in the final video)


Comments
Post a Comment